01 Apr Wake Up Those Flower Beds For Spring
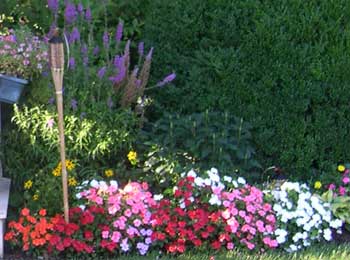
 Start Your Planning Early And Reap The Benefits For Several Months Ahead With Beautiful Colors
How many times have you noticed a neighbor’s beautiful flower beds during the spring and summer and vowed to do the same thing next year?
Then ‘next year’ rolls around and you find yourself saying the same thing, much like a scene out of “Groundhogs Day.”
Well, a little early spring planning can go a long way to enjoying your very own flower beds — perhaps even to the envy of your neighbors.
As this area’s freezing weather nears its end (we hope!), now is the time to begin your preparation and planning — for when the last freeze has passed, it will be time to begin establishing your flower beds.
“Many people get overwhelmed at the process of planning spring flower beds and often don’t know where to start,” said Ralph Dinizo, President of Truesdale Nursery & Landscape Services of Berkeley Heights, N.J. “But with just a few basic tasks, it’s really quite simple and enjoyable, especially when these beds start blooming with the warm weather.”
Spring Cleaning
This is really just a lot of common sense . . . clearing away dead debris to make way for new growth.
Rake away dead leaves and winter debris to allow light and air to reach the soil. Also remove old mulch from your existing flower beds. Replant any perennials immediately that have been partially pushed out of the soil after a long, hard winter. Remove dead growth from your perennials, and cut back or groom ornamental grasses. If you have roses in your flower beds, prune them to allow new growth.
As soon as you’re able to pick up clumps of soil that can fall apart because the snow and ice is gone, it’s time to start digging new flower beds and add compost to your existing beds for flowering plants.
Weeds Be Gone
Weeds begin popping up in early spring. Remove them by their roots. To prevent your lawn from encroaching the flower beds (and bringing more weeds with it), create an edge for your beds. Use a spade to create a trench along the edges of your flower beds or, for the lowest possible maintenance, install permanent edging, such as edging blocks, which are available in a host of styles.
Preparing The Soil
Correctly preparing your flower bed soil will payoff big in terms of a beautiful, lush garden later. Work the soil to remove any rocks or hidden debris. The addition of peat moss also does wonders. A good rule of thumb is to mix in about five pounds per 100 square feet of flower bed. If your soil has really poor drainage, incorporate some sand or grit in the mixture to create better drainage. And if you’re creating new flower beds, a power garden tiller is the best way to mix and turn the soil.
Be Creative In Creating New Flower Beds
If you’re creating new beds, be creative and shape them as ovals or kidneys, for example. Create a peaceful flow. A good way to do this to determine the general shape you desire, then lay your garden hose on the ground in this shape. Use an edging tool or sharp spade to cut into the soil along the outline, being careful not to damage the hose. Create a clean edge and consider installing permanent edging.
Plan Your Plantings
Now for the fun part. Sketch your beds and the placement of flowering plants. Consider spacing and mature plant sizes. For flower beds which are seen only from the front, plant the plants which will be tallest at maturity in the back, then medium height plants in the middle area, and finally, the shortest plants in front. If the flower bed is viewed from all sides, the tallest plants are ideal in the center, surrounded by mid-sized plants, and with the smallest plants along the perimeter.
Distribute early bloomers along with late bloomers throughout the flower bed so that you won’t have one group in bloom, while the rest of the flower bed has no colorful blooms at any given time. Choose a range of colors, shapes, and foliage to enjoy throughout the growing season. Be creative and take chances! You can always do something different next year.
Finally, We Plant
Using your design sketch as a guide, position plants where you want, making sure you allow room for root growth. Position the plant to the proper depth and back-fill the hole, pressing soil firmly to prevent air pockets. Then water thoroughly and let the water soak in.
Mulch Is A Bed’s Best Friend
Mulch is not essential, but you’re going to want to add it, as it’s incredibly helpful in weed control, and adds a finished look to your soil. It also helps retain moisture and highlight the colorful flowers. Choose the mulch which you like best and spread a thick layer over the exposed soil in your flower beds.
By planning ahead and taking time to enjoy every step of the process, seeing those colors bloom for the next several months ahead are going to be most welcomed fruits of your labor.